Setting Up OpenVPN on OpenELEC Kodi
This guide is based on OpenELEC 8 and Zomboided VPN Manager add-on. This guide will be using USB stick.
Step 1
Download the latest Zomboided service VPN manager here. Save the zip file on your USB stick.
Step 2
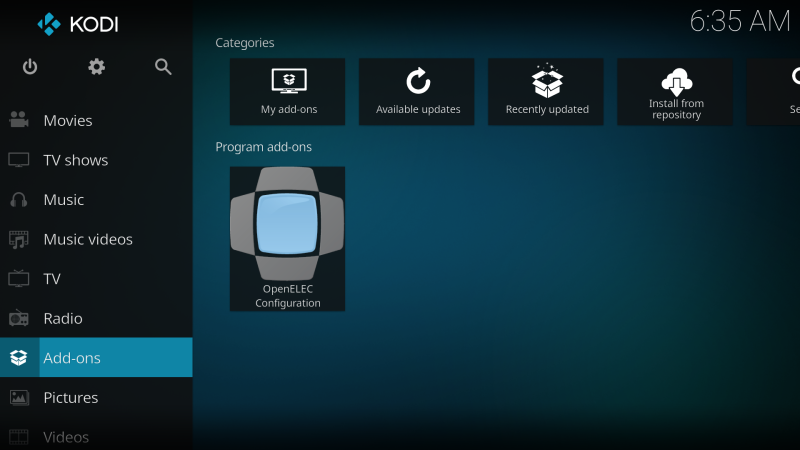
Navigate to Add-ons.
Step 3
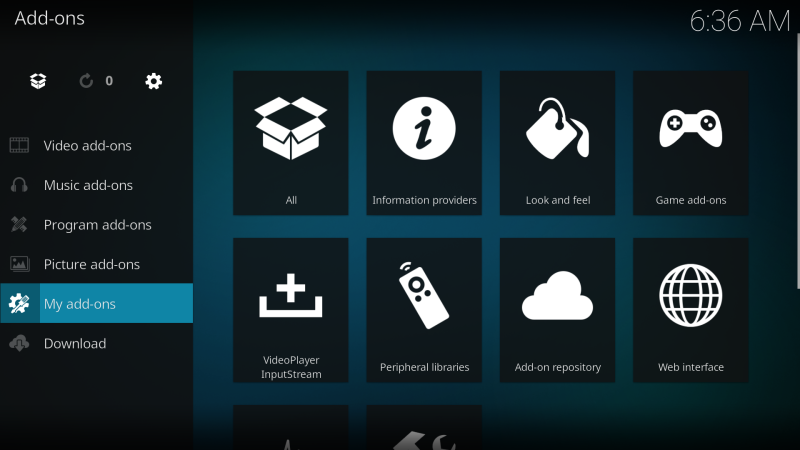
Navigate to My add-ons
Step 4
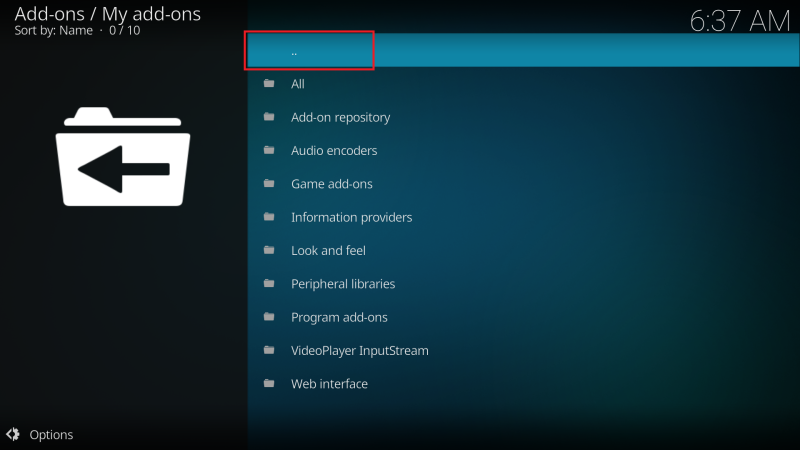
From the list at Add-ons -> My add-ons, click on “..” at the top of the list
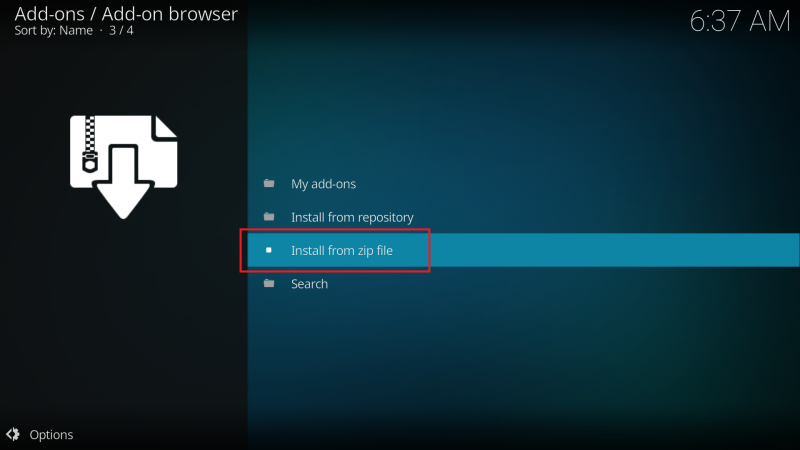
Step 5
Click on Install from zip file
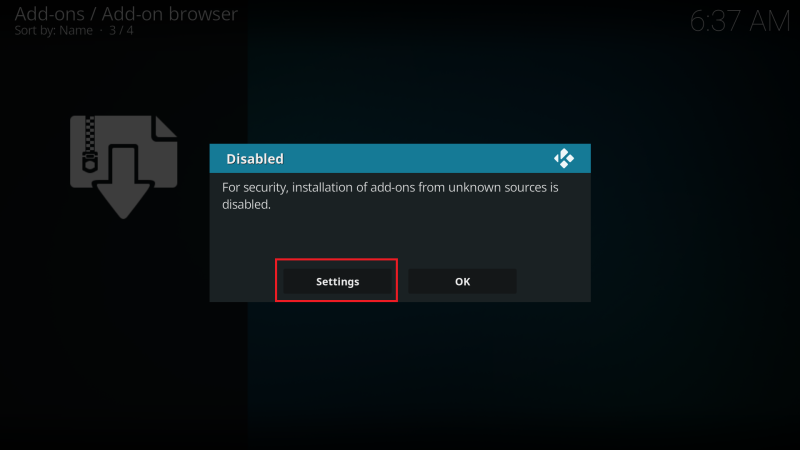
Security warning?
If you see the warning. Click on Settings
If not, just scroll to Step 6
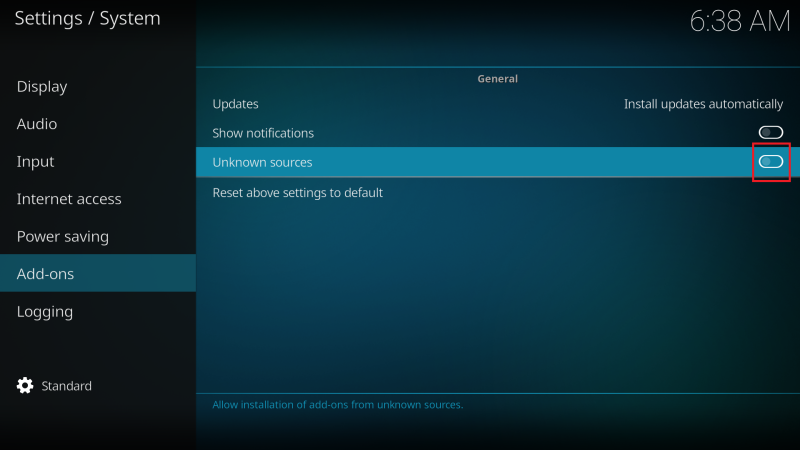
System settings
Swipe Unknown sources switch to the right
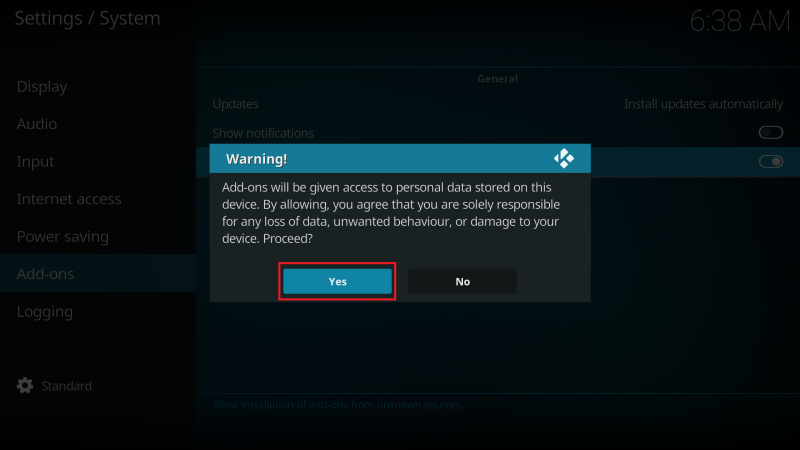
Warning message box
Click on Yes
Step 6
Find and click on your USB stick device.

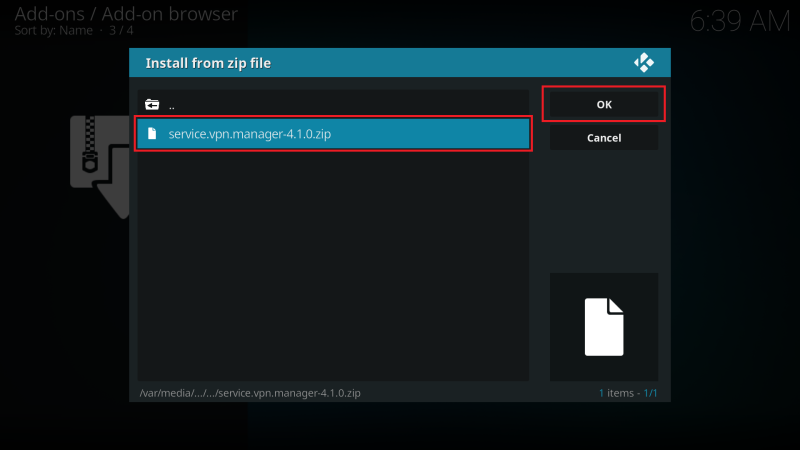
Step 7
Select the repository zip file service.vpn.manager and click on OK
Step 8
VPN Provider: Select PrivateVPN from the list
Username: Enter your PrivateVPN username
Password: Enter your PrivateVPN password
Click on OK

Step 9
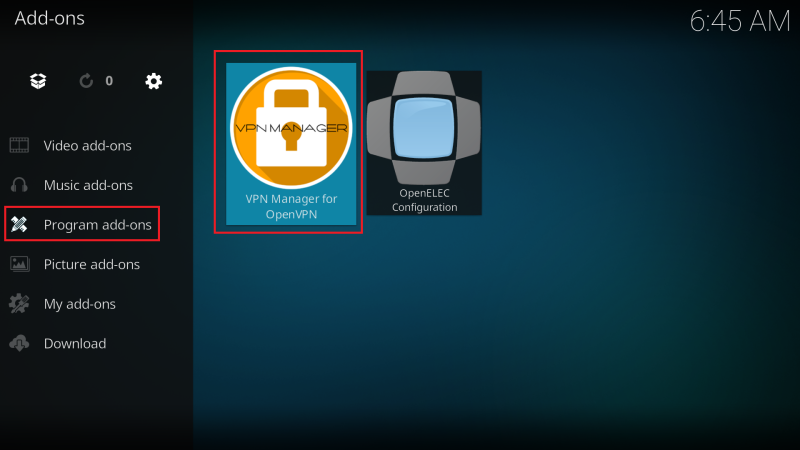
Now when you’ve installed VPN Manager for OpenVPN, navigate to Add-ons -> Program add-ons and click on VPN Manager for OpenVPN
Step 10
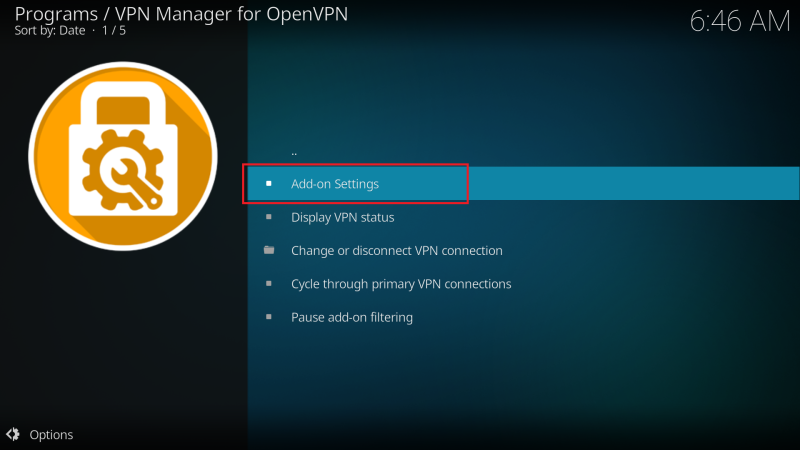
Click on Add-on Settings
Step 11
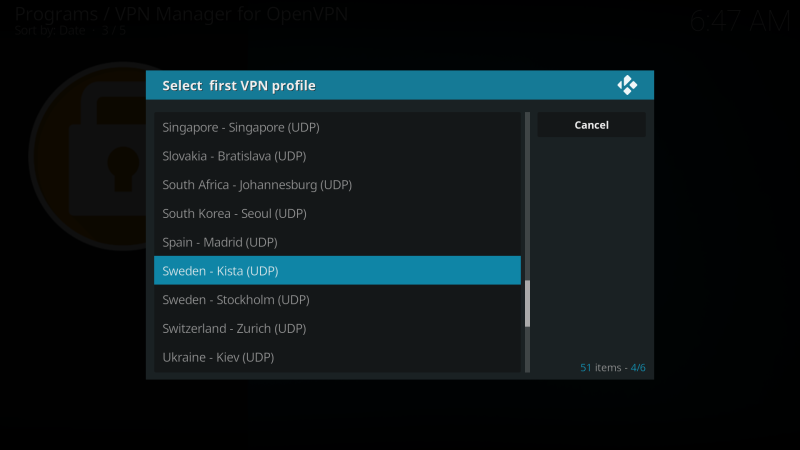
Click on the PrivateVPN VPN location you want to use
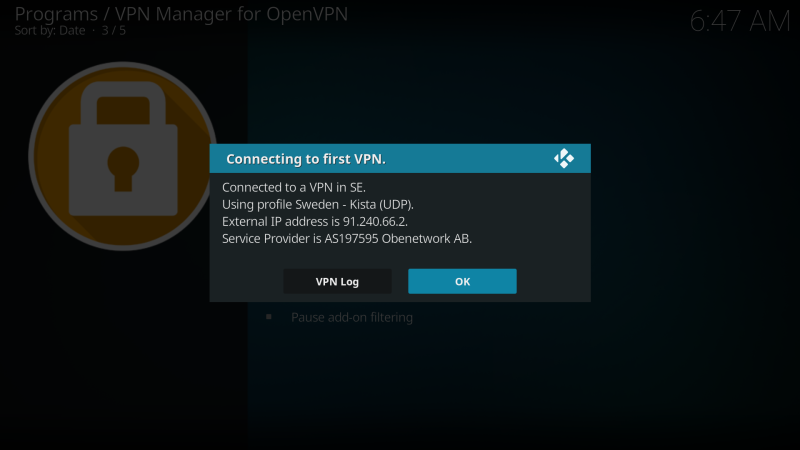
Step 12
Connected!
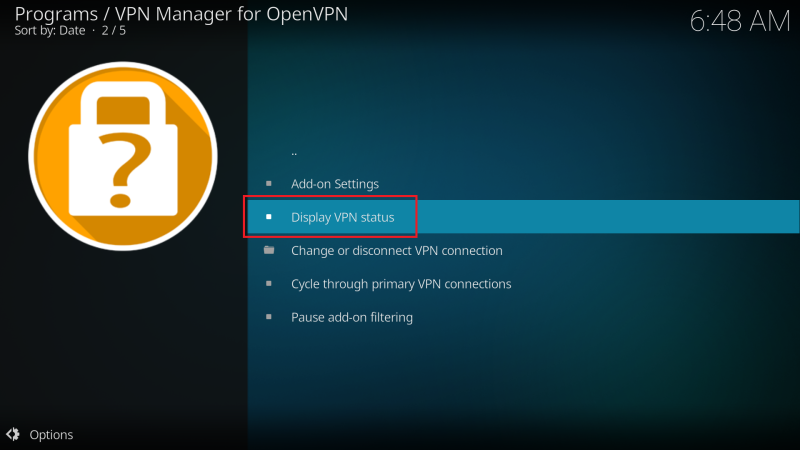
VPN status
You can display VPN status by clicking on Display VPN status
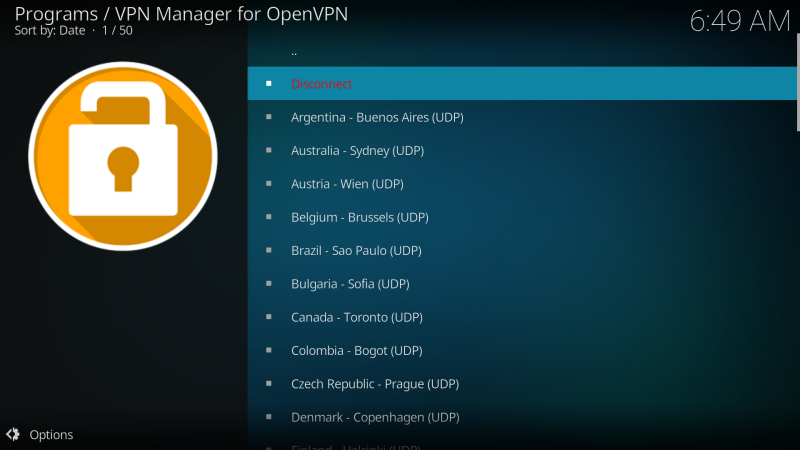
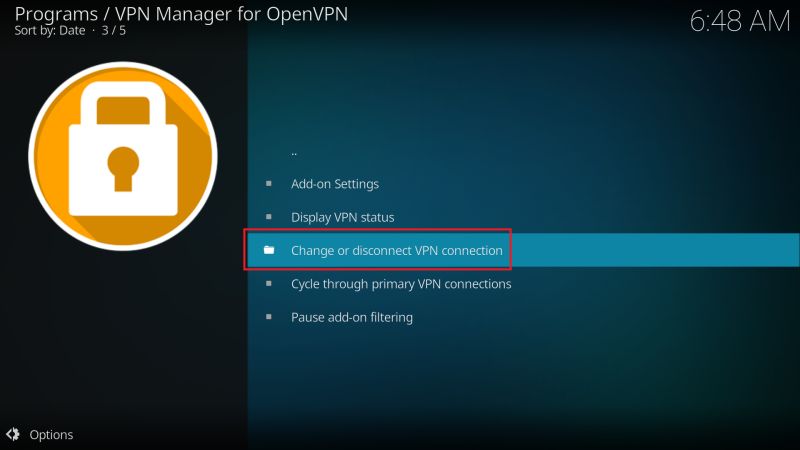
Disconnect or change VPN location?
Click on Change or disconnect VPN connection
Disconnect or change VPN location!
Click on Disconnect or on a new VPN location