The LEMP stack configured in these documents is established in contrast to the popular LAMP Stack used to power many popular web applications. LAMP refers to a Linux-based operating system, the Apache web server, the MySQL database server, and the PHP programing language. The LEMP configuration replaces the Apache web server component with nginx (pronounced “engine x,” providing the “E” in LEMP) to increase the ability of the server to scale in response to demand.
Prerequisites
Install Ubuntu 16.04 in the Client Area:
Login to your VPS using SSH
We will remove Apache2, as on Ubuntu 16.04 template Apache2 is coming as a part of package. This first command will delete everything Apache2 on the system.
apt-get remove --purge apache2 apache2-utils
The second will delete the Apache2 directory:
rm -rf /etc/apache2
Now you are ready to install the LEMP software stack
Nginx installation
All of the software we will be using for this procedure will come directly from Ubuntu’s default package repositories. Let’s update our locale package:
apt-get update
Then we can install Nginx by typing this command:
apt-get install nginx
Now we will remove default Apache page. Go to /var/www/html directory and perform this command:
mv index.nginx-debian.html index.html
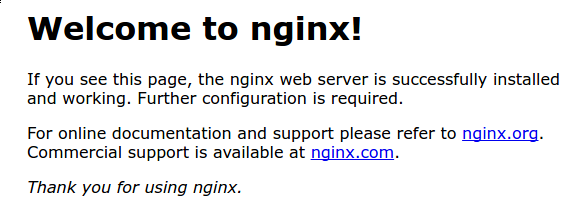
Type one of the addresses that you receive in your web browser. It should take you to Nginx’s default landing page:
http://server_domain_or_IP

Installing Mysql
Next, we’ll install MySQL, which is a database that will be used to store and manage information. You can install this easily by typing:
apt-get install mysql-server
You will be asked to supply a root (administrative) password for use within the MySQL system.
The MySQL database software is now installed, but its configuration is not exactly complete yet.
To secure the installation, we can run a simple security script that will ask whether we want to modify some insecure defaults. Begin the script by typing:
mysql_secure_installation
You will be asked to enter the password you set for the MySQL root account. Next, it will ask you if you want to change that password. If you are happy with your current password, type “n” for “no” at the prompt.
For the rest of the questions, you should simply hit the “ENTER” key through each prompt to accept the default values. This will remove some sample users and databases, disable remote root logins, and load these new rules so that MySQL immediately respects the changes we have made.
At this point, your database system is now set up and we can move on.
Installing PHP
PHP will be used to serve up dynamic web pages to users as they visit your site. We need to start with installing some programs that help PHP communicate with Nginx and MySQL. Do this by typing:
apt-get install php-fpm php-mysql
We now have our PHP components installed, but we need to make a slight configuration change to make our setup more secure. As we need to edit configuration file, let’s install editor:
apt install nano
Open the main php-fpm configuration file to edit with root privileges:
nano /etc/php/7.0/fpm/php.ini
We’re looking for a line that begins with ;cgi.fix_pathinfo . To find it easily in nano, type in Ctrl+w and type in cgi.fix_pathinfo . You need to uncomment this line—remove the semicolon—and change the setting to 0 . The end result should look like this:
cgi.fix_pathinfo=0
Once you’ve saved the file, a quick restart of the PHP processor will enable this change.
systemctl restart php7.0-fpm
Configuring Nginx and PHP
Nginx is already working properly, but it defaults to using HTML to serve up a webpage, not PHP. We need to change that by editing the default Nginx server block.
nano /etc/nginx/sites-available/default
Setup Nginx to look for an index.php file rather than index.html .
Default:
# Add index.php to the list if you are using PHP
index index.html index.htm index.nginx-debian.html;
It should look like:
# Add index.php to the list if you are using PHP
index index.php index.html index.htm index.nginx-debian.html;
After that, you need to uncomment the area that connects to php-fpm .
Default:
# pass the PHP scripts to FastCGI server listening on 127.0.0.1:9000
#
#location ~ \.php$ {
# include snippets/fastcgi-php.conf;
#
# # With php7.0-cgi alone:
# fastcgi_pass 127.0.0.1:9000;
# # With php7.0-fpm:
# fastcgi_pass unix:/run/php/php7.0-fpm.sock;
#}
It should look like:
location ~ \.php$ {
include snippets/fastcgi-php.conf;
# # With php7.0-cgi alone:
# fastcgi_pass 127.0.0.1:9000;
# # With php7.0-fpm:
fastcgi_pass unix:/run/php/php7.0-fpm.sock;
}
Finally, you should restrict access to .htaccess files, which Nginx doesn’t use.
Default:
# deny access to .htaccess files, if Apache’s document root
# concurs with nginx’s one
#
#location ~ /\.ht {
# deny all;
#}
It should look like:
# deny access to .htaccess files, if Apache’s document root
# concurs with nginx’s one
#
location ~ /\.ht {
deny all;
}
Once you’ve made those changes, you can save and close the file and test out the configuration.
nginx -t
If you see any errors, check the file for any syntax mistakes you might have made. Once the command returns a positive result, you can restart Nginx to load the new configuration.
systemctl restart nginx
Testing PHP
In order to test PHP script you need to create simple PHP script in directory /var/www/html. in this case I’ll create phpinfo.php:
nano /var/www/html/phpinfo.php
Add the following line:
<?php phpinfo(); ?>
Save and exit ( Ctrl + O, Ctrl + X).
Test the php script you have made from web browser by typing in address bar:
http://ip_address/phpinfo.php
This page basically gives you information about your server from the perspective of PHP. It is useful for debugging and to ensure that your settings are being applied correctly.
At this point you are pretty much finished with the installation, you can begin testing out some webpages, scripts etc.